Exercise: Gatcha
References:
Resources:
In this exercise you'll design your own character and randomly change their expressions by introducing variables into your sketches which allow for change over time and increased interactivity. To make a succinct and complete sketch, we will also experiment with loading our own images into p5.js so we don't need to draw everything in p5.
Setting up Github
Before the p5.js exercise, let's connect our code to Github. Github will allow us to track our code, and prevent us from losing data. It will also help us get our projects online so we can easily share them.
- Sign up or log in to Github in your web browser
- Install the GitHub Pull Requests Plugin for VS Code plugin in VS Code
- Using the VS Code Github Pull Requests Plugin create a new repository by opening the folder where you are storing your p5 files (I am storing mine on my desktop in a folder called
vd-computation), and navigating to the tab for "Source Control" in left-hand tab sidebar. Follow the prompts to create a "Public" repository. - Now, if we look on Github you can now see your files are stored there in a new "Repository" with the same name. When we "push" code from our VS Code editor now, we can see the files updated in our Github Repo.
- When you make changes to your files you'll notice an update in the left-hand tab sidebar of VS Code. This is where you'll "push" and "pull" updates to your code
- Add this Github Pages Index file file to the root of your repository. It will serve as the landing page of your Github website. (please update it with your own info and add new links whenever you create a new exercise)
- On github.com go to your repository, then to the pages tab in the settings
- Under "Build and Deployment" select the "Source" to "Deploy from a branch".
- Now if we wait a little bit navigating to this url
https://your-username.github.io/your-repository-name(after replacingyour-usernameandyour-repository-namewith your own information) will load your websites! - Use Github to publish your sketches to the web, and keep track of changes to your files! If you routinely push your code to the web, you can retrieve your code if you have an issue on your local computer, or want to see a previous version of a file.
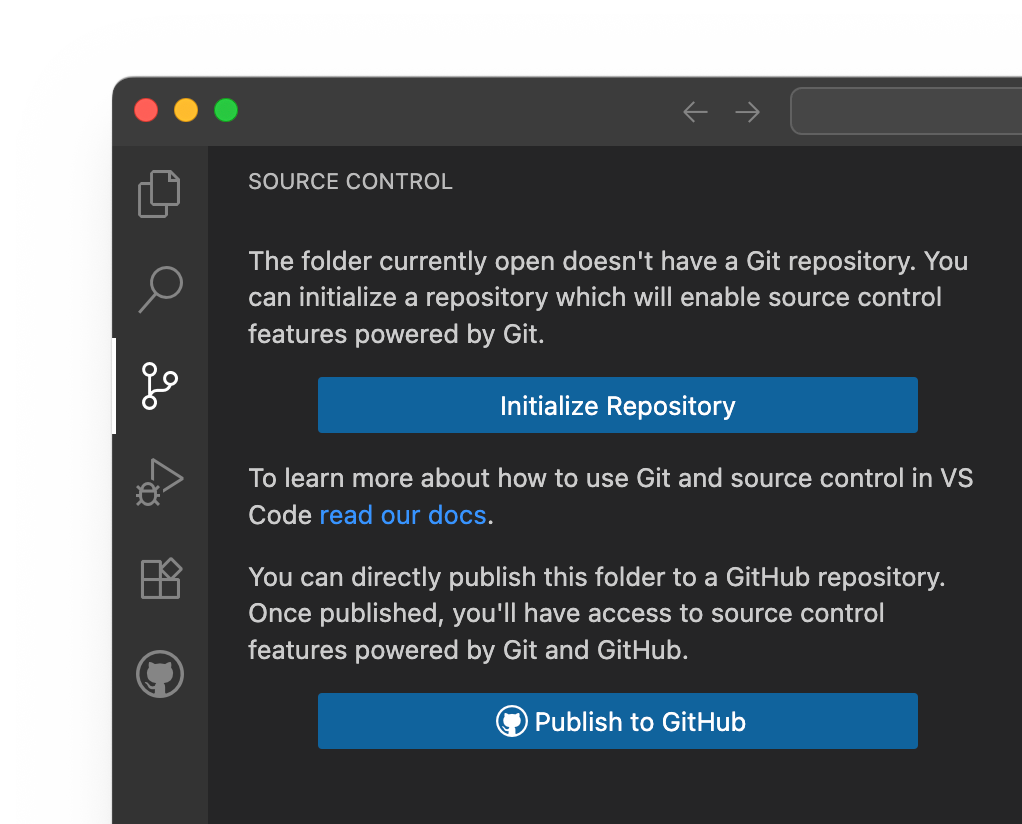
Enabling a Github Repo through the Source Control tab in VS Code
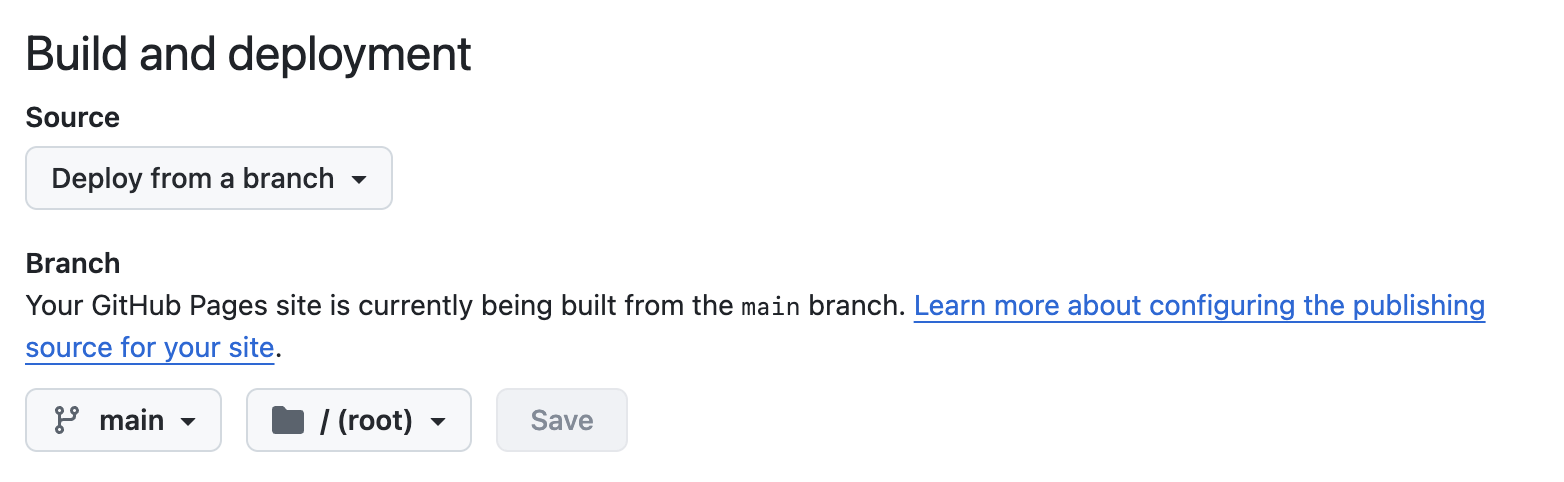
Deploying a Github Pages website
Loading Images
For this sketch we will load images of a character, and dynamically swap them using a variable. We will use these images to get started, but you will be asked to create your own imagery for the final exercise. You can copy this Figma file if you'd like to use it as a starting point.
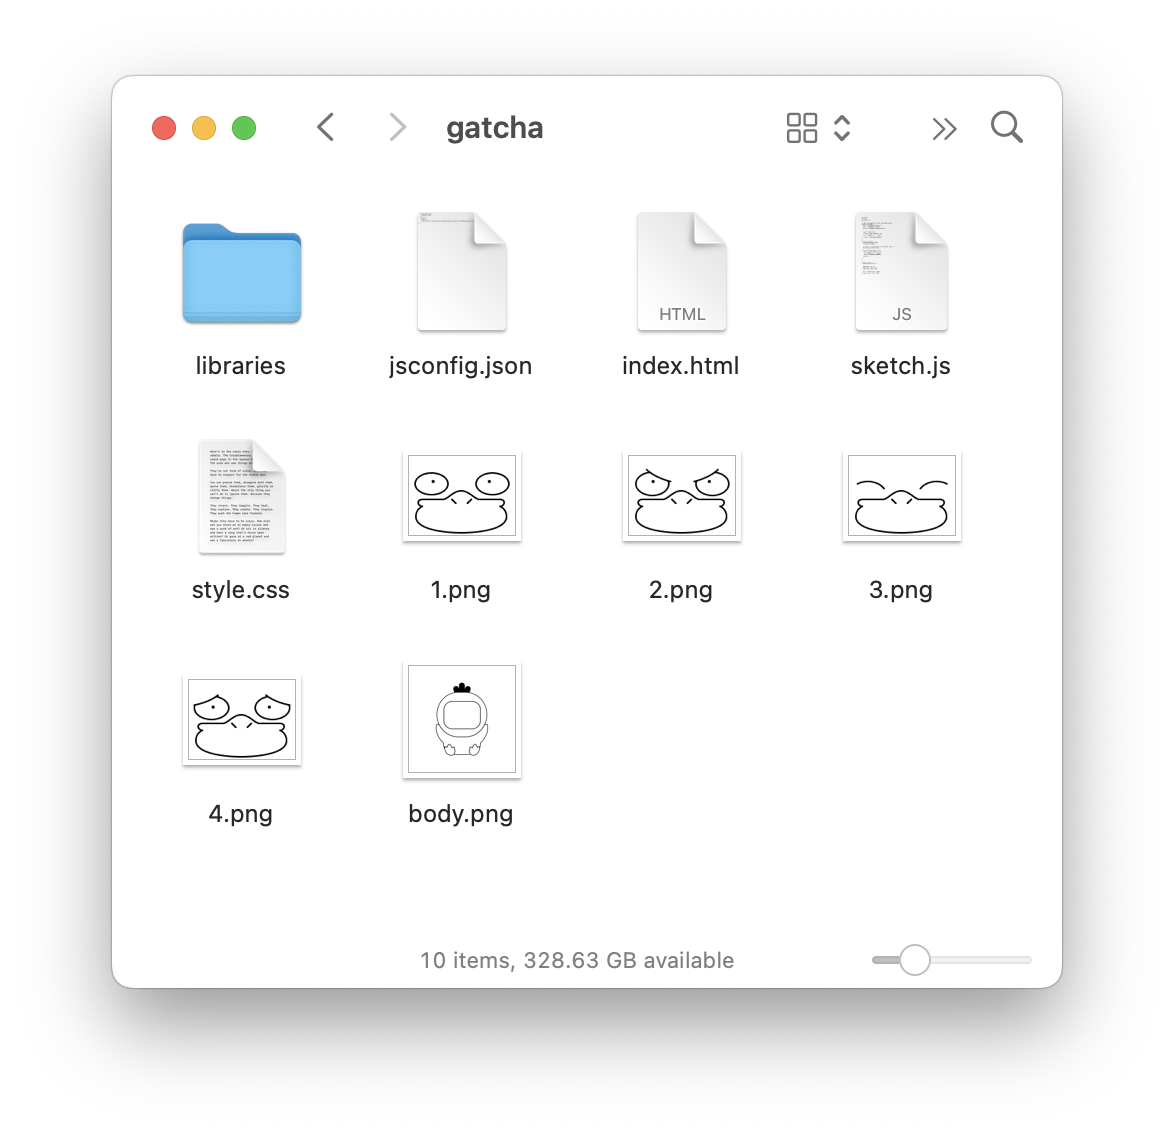
Files for gatcha sketch
Create a new p5.js project in a new folder named "gatcha" within you local Github repository and copy the images into the root folder of that sketch – let's leave the canvas as-is when working with a new project:
function setup() {
  createCanvas(400, 400);
}
And then create two variables – one for the body of the character and one for the face. We need to declare the variables. Create these at the very top of the document so they're available in the entire sketch:
let body;
let face;

function setup() {
  createCanvas(400, 400);
}
let is informing the document that you are making a variable, and the word following the space is giving the variable a name. A variable is a container for information which can be manipulated throughout your sketch. A variable can hold many types of information including a text "string", "number", "boolean" (true or fale) or an "array" (more on this later...). In our case we'll be storing image names as text "string"s. Because of how images are loaded into p5.js, it's simplest to use a separate preload function to access the images later:
function preload() {
  body = loadImage('body.png');
  face = loadImage('1.png');
}
We can now place an image into our sketch using the image function:
image(body, 0, 0);in this case the body variable is being passed as the source of the image (the text string is being used to find the image in your folders), and the 0, 0 are the location on the canvas. Since our body.png image is 400 x 400px, it sits in the center of te page.
Let's first place the body and face images, so our sketches would like the following:
let body;
let face;

function preload() {
  body = loadImage('body.png');
  face = loadImage('1.png');
}

function setup() {
  createCanvas(400, 400);
  background('beige');
  image(body, 0, 0);
  image(face, 132, 134);
}
the image function takes 3 values – the filename, and x and y positions of the image.
Manipulating Variables
So far we've created a static composition. Let's manipulate the face variable to select a different "face" for our gatcha everytime the webpage loads. In your setup function, add the following code:
// get random face
face = loadImage(int(random(1, 5)) + ".png");
here rather than passing a static 'string' we are doing a calculation which randomly selects a number from 1 - 4, then converts it into an integer. This is then turned into a string that matches one of our filenames (1.png, 2.png, etc.). Our full code looks like this:
let body;
let face;

function preload() {
  body = loadImage('body.png');

  // select a random image
  face = loadImage(int(random(1, 5)) + ".png");
}

function setup() {
  createCanvas(400, 400);
  background('beige');
  image(body, 0, 0);
  image(face, 132, 134);
}
Now when we reload the page, a new face will appear on the gatcha!
Example Gorapadeok
To make our code a bit more clear, and easy to follow, let's restructure it to use multiple variables.
let body;
let face;

function preload() {
  body = loadImage('body.png');

  // select a random image
  let n = int(random(1, 5));
  let imgName = n + ".png";
  face = loadImage(imgName);
}

function setup() {
  createCanvas(400, 400);
  background('beige');
  image(body, 0, 0);
  image(face, 132, 134);
}
This isn't neccesary for our sketch, but it helps us to understand the process of choosing a random number between 1-4, concatinating the string to make an image name, then passing that variable to the face variable for use later in the document.
Design Your Own Gatcha
Now that we have our sketch set up, draw a new face update the sketch to add it as another possible expression, and/or draw your a character of your choice with set of expressions.

Extra Credit
Add a button to your page which randomly selects a new face on click.
let body;
let face;

function preload() {
  body = loadImage('body.png');

  // get random face
  let n = int(random(1, 5));
  let imgName = n + ".png";
  face = loadImage(imgName);
}

function setup() {
  createCanvas(400, 400);

  let button = createButton('🤗');
  button.position(10, 10);

  button.mousePressed(() => {
    let n = int(random(1, 5));
    let imgName = n + ".png";
    face = loadImage(imgName);
  });
}

function draw() {
  background("beige");
  image(body, 0, 0);
  image(face, 132, 134);
}
Extra Extra Credit
Use an if statement to change the background color of the page if a certain face is loaded. As a starting point, I would use the "n" variable to do so (in which case you would need to declare it so it has a global scope within the document).
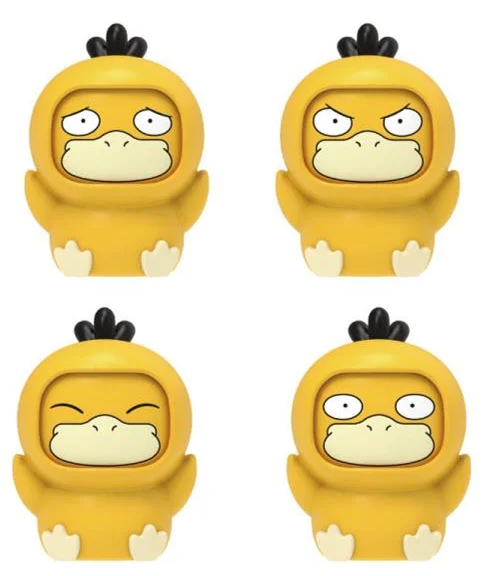
Face changing Pokemon Toy
Due Sep 16 (1 day)
Topics: Setting Up Github, Loading Images, Variables